部署 Nagios 监控服务器
My roommate lost his pet elephant. It’s in the apartment somewhere.
— Steven Wright
我们无法持续关注所有的一切。问题是:你怎么知道一台服务器何时会出现故障呢? 错误的答案是,“我的客户打电话给我,告诉我服务器宕机了。” 但是,你会惊奇地发现,许多组织的系统没有任何的自动监控。自动监控的设置非常简单。 目前有许多优秀的免费开源的自动监测工具可用,包括 Nagios、Icinga、Zabbix 和 Zenoss。 Nagios 是其中历史最久最复杂的一个,尽管它有一个难以配置的名声(基本上是实至名归的)。
本处方将向你展示如何使用 Puppet 创建一个基于 Nagios 的监控服务器以及 如何让 Puppet 配置由 Nagios 监控的每台机器。
准备工作
你将需要我们已经在第 7 章的 管理 Apache 服务 一节中创建的 Apache 模块。
操作步骤
创建一个 nagios 模块:
# mkdir /etc/puppet/modules/nagios
# mkdir /etc/puppet/modules/nagios/files
# mkdir /etc/puppet/modules/nagios/manifests
使用如下内容创建 /etc/puppet/modules/nagios/manifests/server.pp 文件:
class nagios::server {
    include apache

    package { [ "nagios3",
                "nagios-images",
                "nagios-nrpe-plugin" ]:
        ensure => installed,
    }

    service { "nagios3":
        ensure => running,
        enable => true,
        require => Package["nagios3"],
    }

    exec { "nagios-config-check":
        command => "/usr/sbin/nagios3 -v /etc/nagios3/nagios.
 cfg && /usr/sbin/service nagios3 restart",
        refreshonly => true,
    }

    file { "/etc/apache2/sites-available/nagios.conf":
        source  => "puppet:///modules/nagios/nagios.conf",
        notify  => Service["apache2"],
        require => Package["apache2-mpm-prefork"],
    }

    file { "/etc/apache2/sites-enabled/nagios.conf":
        ensure  => symlink,
        target  => "/etc/apache2/sites-available/nagios.conf",
        require => Package["apache2-mpm-prefork"],
    }

    file { [ "/etc/nagios3/generic-service_nagios2.cfg",
             "/etc/nagios3/services_nagios2.cfg",
             "/etc/nagios3/hostgroups_nagios2.cfg",
             "/etc/nagios3/extinfo_nagios2.cfg",
             "/etc/nagios3/localhost_nagios2.cfg",
             "/etc/nagios3/contacts_nagios2.cfg",
             "/etc/nagios3/conf.d"
           ]:
        ensure => absent,
        force  => true,
    }

    define nagios-config() {
        file { "/etc/nagios3/${name}":
            source  => "puppet:///modules/nagios/${name}",
            require => Package["nagios3"],
            notify => Exec["nagios-config-check"],
        }
    }

    nagios-config { [ "htpasswd.nagios",
                      "nagios.cfg",
                      "cgi.cfg",
                      "hostgroups.cfg",
                      "hosts.cfg",
                      "host_templates.cfg",
                      "service_templates.cfg",
                      "services.cfg",
                      "timeperiods.cfg",
                      "contacts.cfg",
                      "commands.cfg" ]: }

    file { "/var/lib/nagios3":
        # see http://bugs.debian.org/cgi-bin/bugreport.cgi?bug=478889
        mode    => 751,
        require => Package["nagios3"],
        notify  => Service["nagios3"],
    }

    file { "/var/lib/nagios3/rw":
        # see http://bugs.debian.org/cgi-bin/bugreport.cgi?bug=478889
        mode    => 2710,
        require => Package["nagios3"],
        notify  => Service["nagios3"],
    }
}
使用如下内容创建 /etc/puppet/modules/nagios/files/nagios.cfg 文件:
# Config files to read
cfg_file=/etc/nagios3/commands.cfg
cfg_file=/etc/nagios3/service_templates.cfg
cfg_file=/etc/nagios3/host_templates.cfg
cfg_file=/etc/nagios3/timeperiods.cfg
cfg_file=/etc/nagios3/contacts.cfg
cfg_file=/etc/nagios3/hostgroups.cfg
cfg_file=/etc/nagios3/hosts.cfg
cfg_file=/etc/nagios3/services.cfg

# Nagios settings
log_file=/var/log/nagios3/nagios.log
illegal_macro_output_chars=`~$&|'"<>
check_result_path=/var/lib/nagios3/spool/checkresults
nagios_user=nagios
nagios_group=nagios
command_file=/var/lib/nagios3/rw/nagios.cmd
lock_file=/var/run/nagios3/nagios3.pid
p1_file=/usr/lib/nagios3/p1.pl
check_external_commands=1
resource_file=/etc/nagios3/resource.cfg
使用如下内容创建 /etc/puppet/modules/nagios/files/service_templates.cfg 文件:
define service{
    name                         generic_service
     ; The 'name' of this service template
    active_checks_enabled        1
     ; Active service checks are enabled
    passive_checks_enabled       1
     ; Passive service checks are enabled/accepted
    parallelize_check            1
     ; Active service checks should be parallelized
     ; (disabling this can lead to major performance problems)
    obsess_over_service          1
     ; We should obsess over this service (if necessary)
    check_freshness              0
     ; Default is to NOT check service 'freshness'
    notifications_enabled        1
     ; Service notifications are enabled
    event_handler_enabled        1
     ; Service event handler is enabled
    flap_detection_enabled       1
     ; Flap detection is enabled
    failure_prediction_enabled   1
     ; Failure prediction is enabled
    process_perf_data            1
     ; Process performance data
    retain_status_information    1
     ; Retain status information across program restarts
    retain_nonstatus_information 1
     ; Retain non-status information across program restarts
    notification_interval        0
     ; Only send notifications on status change by default.
    is_volatile                  0
    check_period                 24x7
    normal_check_interval        5
    retry_check_interval         2
    max_check_attempts           3
    notification_period          24x7
    notification_options         c,r
    contact_groups               sysadmin
    register                     0
     ; DONT REGISTER THIS DEFINITION
     ;   - ITS NOT A REAL SERVICE, JUST A TEMPLATE!
}

# Defaults
define service {
    name                         every_5_mins
    normal_check_interval        5
    use                          generic_service
    register                     0
}

define service {
    name                         every_hour
    normal_check_interval        60
    use                          generic_service
    register                     0
}

define service {
    name                         every_day
    normal_check_interval        1440
    use                          generic_service
    register                     0
}
使用如下内容创建 /etc/puppet/modules/nagios/files/services.cfg 文件:
define service {
    hostgroup_name               all
    service_description          Disk
    check_command                check_nrpe!check_all_disks!20%!10%
    use                          every_day
}

define service {
    hostgroup_name               all
    service_description          Load
    check_command                check_nrpe!check_load!10,10,10!15,15,15
    use                          every_hour
}
使用如下内容创建 /etc/puppet/modules/nagios/files/cgi.cfg 文件:
main_config_file=/etc/nagios3/nagios.cfg
physical_html_path=/usr/share/nagios3/htdocs
url_html_path=/nagios3
show_context_help=1
use_pending_states=1
nagios_check_command=/usr/lib/nagios/plugins/check_nagios
 /var/cache/nagios3/status.dat 5 '/usr/sbin/nagios3'
use_authentication=1
use_ssl_authentication=0
authorized_for_system_information=nagios
authorized_for_configuration_information=nagios
authorized_for_system_commands=nagios
authorized_for_all_services=nagios
authorized_for_all_hosts=nagios
authorized_for_all_service_commands=nagios
authorized_for_all_host_commands=nagios
default_statusmap_layout=5
default_statuswrl_layout=4
ping_syntax=/bin/ping -n -U -c 5 $HOSTADDRESS$
refresh_rate=90
escape_html_tags=1
action_url_target=_blank
notes_url_target=_blank
lock_author_names=1
使用如下内容创建 /etc/puppet/modules/nagios/files/host_templates.cfg 文件:
define host{
    name                          generic_host
    check_command                 check-host-alive
    max_check_attempts            3
    checks_enabled                1
    failure_prediction_enabled    1
    retain_status_information     1
    retain_nonstatus_information  1
    notification_interval         0
    notification_options          d,u,r
    check_interval                300
    contact_groups                sysadmin
    register                      0
}
使用如下内容创建 /etc/puppet/modules/nagios/files/contacts.cfg 文件 (使用你自己的 e-mail 地址,或者至少是一个不介意从你的监控服务获得大量邮件的人的 e-mail 地址):
define contact {
    contact_name                    helen
    alias Helen                     Highwater
    service_notification_period     24x7
    host_notification_period        24x7
    service_notification_options    w,u,c,r
    host_notification_options       d,r
    service_notification_commands   notify-service-by-email
    host_notification_commands      notify-host-by-email
    email                           helen@example.com
}

define contactgroup {
    contactgroup_name               sysadmin
    alias                           Sysadmins
    members                         helen
}
使用如下内容创建 /etc/puppet/modules/nagios/files/hostgroups.cfg 文件:
define hostgroup {
    hostgroup_name                   all
    alias                            All Servers
    members                          *
}
使用如下内容创建 /etc/puppet/modules/nagios/files/timeperiods.cfg 文件:
define timeperiod {
   timeperiod_name      24x7
   alias                24 Hours A Day, 7 Days A Week
   sunday               00:00-24:00
   monday               00:00-24:00
   tuesday              00:00-24:00
   wednesday            00:00-24:00
   thursday             00:00-24:00
   friday               00:00-24:00
   saturday             00:00-24:00
}
使用如下内容创建 /etc/puppet/modules/nagios/files/hosts.cfg 文件 (使用你自己的服务器信息替换相应的配置值):
define host {
   host_name           cookbook
   address             cookbook.bitfieldconsulting.com
   use                 generic_host
}
使用如下内容创建 /etc/puppet/modules/nagios/files/commands.cfg 文件:
define command {
   command_name   check_nrpe
   command_line   $USER1$/check_nrpe -H $HOSTADDRESS$ -c $ARG1$
    -a $ARG2$ $ARG3$ $ARG4$ $ARG5$
}

define command{
   command_name  check-host-alive
   command_line  $USER1$/check_ping -H '$HOSTADDRESS$' -w
    5000,100% -c 5000,100% -p 1
}

define command{
   command_name  check_all_disks
   command_line  /usr/lib/nagios/plugins/check_disk -w '$ARG1$'
    -c '$ARG2$' -e
}

define command{
   command_name   notify-host-by-email
   command_line   /usr/bin/printf "%b" "***** Nagios *****\n\
    nNotification Type: $NOTIFICATIONTYPE$\nHost: $HOSTNAME$\
    nState: $HOSTSTATE$\nAddress: $HOSTADDRESS$\nInfo:
    $HOSTOUTPUT$\n\nDate/Time: $LONGDATETIME$\n" | /usr/bin/mail
    -s "** $NOTIFICATIONTYPE$ Host Alert: $HOSTNAME$ is
    $HOSTSTATE$ **" $CONTACTEMAIL$
}

define command{
   command_name  notify-service-by-email
   command_line  /usr/bin/printf "%b" "***** Nagios
    *****\n\nNotification Type: $NOTIFICATIONTYPE$\n\nService:
    $SERVICEDESC$\nHost: $HOSTALIAS$\nAddress: $HOSTADDRESS$\
    nState: $SERVICESTATE$\n\nDate/Time: $LONGDATETIME$\n\
    nAdditional Info:\n\n$SERVICEOUTPUT$" | /usr/bin/mail -s "**
    $NOTIFICATIONTYPE$ Service Alert: $HOSTALIAS$/$SERVICEDESC$ is
    $SERVICESTATE$ **" $CONTACTEMAIL$
}
使用如下内容创建 /etc/puppet/modules/nagios/files/nagios.conf 文件 (用你自己的服务器替换 ServerName 的配置值):
ScriptAlias /cgi-bin/nagios3 /usr/lib/cgi-bin/nagios3
ScriptAlias /nagios3/cgi-bin /usr/lib/cgi-bin/nagios3

Alias /nagios3/stylesheets /etc/nagios3/stylesheets
Alias /nagios3 /usr/share/nagios3/htdocs
Alias / /usr/share/nagios3/htdocs/

<DirectoryMatch (/usr/share/nagios3/htdocs|/usr/lib/cgi-bin/
nagios3|/etc/nagios3/stylesheets)>

   Options FollowSymLinks

   DirectoryIndex index.html

   AllowOverride AuthConfig

   Order Allow,Deny
   Allow From All

   AuthName "Nagios Access"
   AuthType Basic
   AuthUserFile /etc/nagios3/htpasswd.nagios
   require valid-user
</DirectoryMatch>

<VirtualHost *:80>
   ServerName nagios.bitfieldconsulting.com
   ErrorLog /var/log/apache2/nagios-error_log
   CustomLog /var/log/apache2/nagios-access_log common
   DocumentRoot /usr/share/nagios3
</VirtualHost>
创建口令文件控制对 Nagios web 界面的访问:
# htpasswd -c /etc/puppet/modules/nagios/files/htpasswd.nagios
nagios
Password: (type password)
如果你的系统中还没有 htpasswd 程序,运行如下的命令:
# apt-get install apache2-utils在前面的代码中指定的 ServerName 为你创建一个 /etc/hosts 条目或 DNS 记录,本例中的主机名是:
nagios.bitfieldconsulting.com在你的 Nagios 服务器的节点中定义中包含如下代码:
include nagios::server使用如下内容创建 /etc/puppet/modules/nagios/files/nrpe.cfg 文件 (使用你自己的监控服务器的主机名或 IP 地址替换 allowed_hosts 设置值):
log_facility=daemon
pid_file=/var/run/nagios/nrpe.pid
server_port=5666
nrpe_user=nagios
nrpe_group=nagios
allowed_hosts=cookbook.bitfieldconsulting.com
dont_blame_nrpe=1
debug=0
command_timeout=60
connection_timeout=300
command[check_load]=/usr/lib/nagios/plugins/check_load -w $ARG1$
-c $ARG2$
command[check_all_disks]=/usr/lib/nagios/plugins/check_disk -w
$ARG1$ -c $ARG2$ -e -A -i '.gvfs'
使用如下内容创建 /etc/puppet/modules/nagios/manifests/target.pp 文件:
class nagios::target {
   package { [ "nagios-nrpe-server",
               "nagios-plugins",
               "nagios-plugins-basic",
               "nagios-plugins-standard",
               "nagios-plugins-extra" ]:
       ensure => installed,
   }

   service { "nagios-nrpe-server":
       enable  => true,
       ensure  => running,
       pattern => "/usr/sbin/nrpe",
       require => Package["nagios-nrpe-server"],
   }

   file { "/etc/nagios/nrpe.cfg":
       source  => "puppet:///modules/nagios/nrpe.cfg",
       require => Package["nagios-nrpe-server"],
       notify  => Service["nagios-nrpe-server"],
   }
}
在你要监控的所有节点(也应该包括 Nagios 服务器自己)上包含这个类:
include nagios::target在 Nagios 服务器上运行如下 Puppet 命令:
# puppet agent --test使用浏览器打开 Nagios 的 web 界面(使用用户名 nagios 和你在前面的代码中设置的口令登录) 检查你看到的 Nagios 欢迎界面,如图所示:
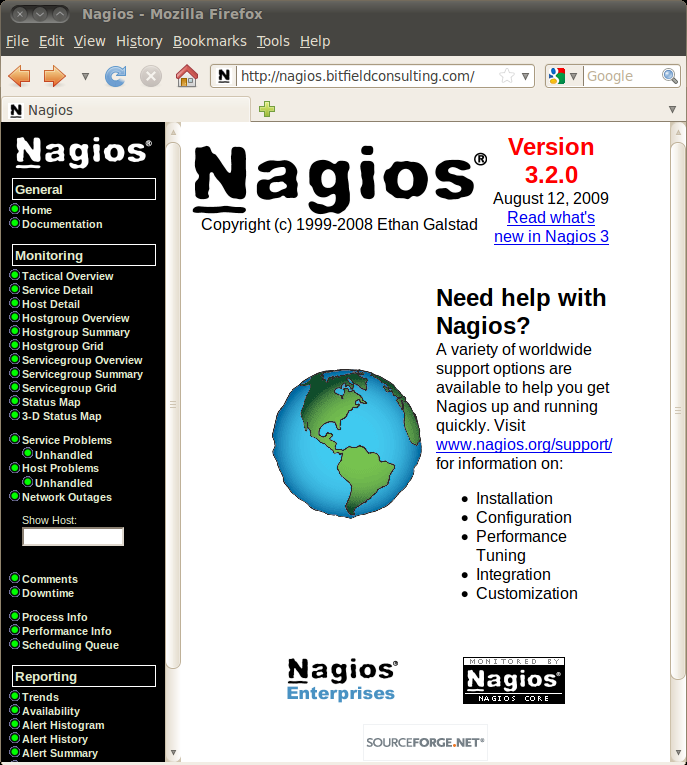
点击 Host detail 菜单,在界面中你应该看到目标节点的列表。
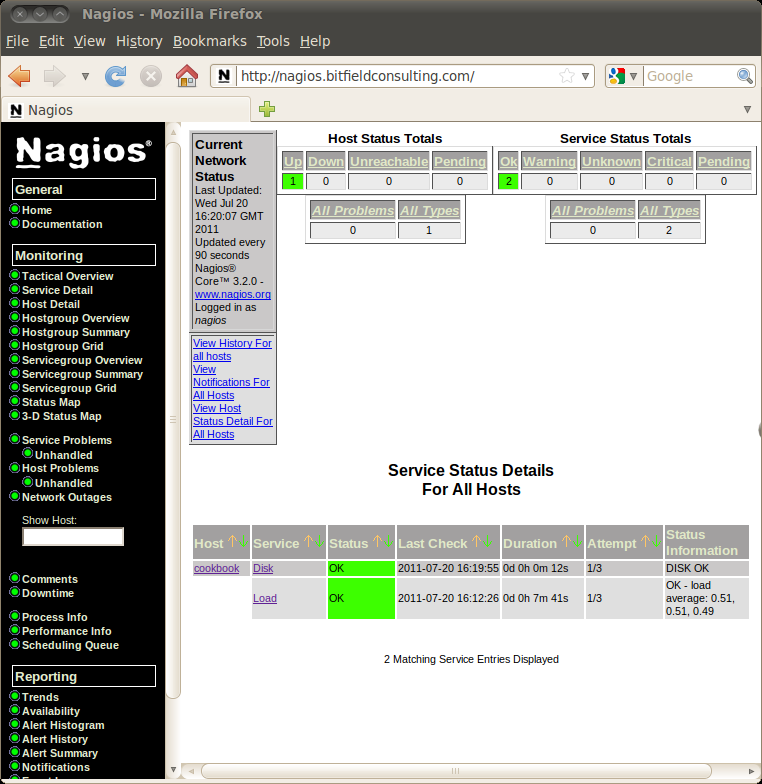
点击节点的名字,之后从 Host commands 菜单中选择 "Schedule a check of all services on this host"。
在 "Force check" 复选框上打勾将其选中并单击 "Commit"。 这会花几秒钟运行 Nagios 的检查。 点击 "Service detail" 菜单,在界面中你应该看到显示为绿色的服务列表,如图所示:
工作原理
尽管这个处方相当的长,但是 Puppet 的配置清单本身却很简单; 这里没有我们在其他处方中还没使用过的配置技巧。
本质上,我们所做的就是安装 Nagios 包,配置服务于它的 Apache 虚拟主机, 为 Nagios 部署一系列的配置文件,这些配置文件用于告诉 Nagios 要检查哪些主机、 检查哪些服务以及其他一些杂七杂八的配置。
在客户端,由 Nagios 监控的每个节点上都需要安装 nagios-nrpe-server 包 (NRPE 是使 Nagios 能在远程服务器上安全地执行命令的协议) 以及告诉 NRPE 服务允许执行哪些命令的配置文件。
你应该知道,nrpe.cfg 文件中的 dont_blame_nrpe 设置是一个潜在的安全漏洞, 因为它允许在远程主机上使用用户提供的参数去执行命令。 这是一个非常有用的功能,因为这意味着你可以在无需重新配置每一个监控机的情况下, 就可以改变警报阈值或其他参数。 然而,如果你不需要这个功能,禁用 dont_blame_nrpe 设置会更安全。
更多用法
使用 Nagios 最为棘手的事情,就是获取、配置及首次执行。 虽然这里介绍的是非常基本的监控配置(仅包括对磁盘占用和 CPU 负载的检查), 你可以使用这个配置作为 Nagios 设置工作的起点,添加更多要检查的服务和主机。 你可能想要添加如下的一些配置:
主机组(例如,web 服务器组或数据库服务器组):你可以配置一个检查自动应用到主机组的每个成员。
Web 站点检查:配置 Nagios 的 check_http plugin 插件是相当复杂的, 它可以处理重定向、SSL、认证以及在一个 Web 页面中匹配文本。
进程检查:监视一个主机上指定的进程是一个常见的需求。使用 check_procs 插件可以实现。
不同的检查频率:我已经在 service_templates.cfg 模板中定义了 every_hour、 every_day 和 every_5_mins;你可能想要添加一些新的频率设置。
新的时间周期;在 timeperiods.cfg 中,当前仅定义了一个时间周期 24x7, 但你可能想要创建自己的时间周期。例如,如果要从午夜 0 点到凌晨 1 点执行数据库的维护工作, 你可以定义一个排除了这段时间的时间周期,而不会获得来自这个数据库服务器的误报。
要找到如何配置 Nagios 的更多内容, 请参考文档: http://nagios.sourceforge.net/docs/nagioscore/3/en/toc.html 。
在 Puppet 中也有一些对 Nagios 内置支持;你可以让 Puppet 从配置清单生成主机和服务的定义, 这是一个强大而有用的功能。尽管我在一些生产站点上会使用这个功能,但基于篇幅的原因, 我不得不遗憾地排除了对它的介绍。若你希望找到与这部分的相关的内容,请参考 Puppet 的官方文档以及 Mike Gurski 撰写的有关这个主题的优秀文章: http://blog.gurski.org/index.php/2010/01/28/automatic-monitoring-with-puppet-and-nagios/ 。