11.2 显示微博
尽管我们还没实现直接在网页中发布微博的功能(将在 11.3.2 节实现),不过还是有办法显示微博,并对显示的内容进行测试。我们将按照 Twitter 的方式,不在微博资源的 index 页面显示用户的微博,而在用户资源的 show 页面显示,构思图如图 11.4 所示。我们会先使用一些简单的 ERb 代码,在用户的资料页面显示微博,然后在 9.3.2 节的种子数据中添加一些微博,这样才有内容可以显示。
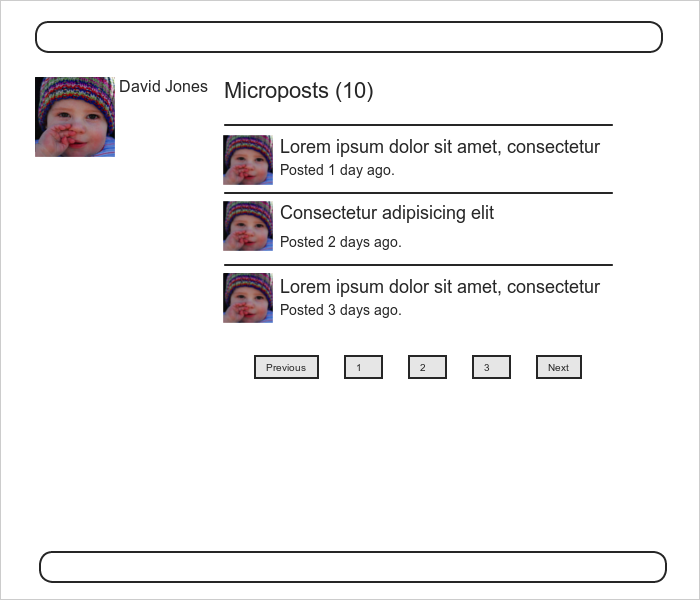 图 11.4:显示有微博的资料页面构思图
11.2.1 渲染微博
我们计划在用户的资料页面(show.html.erb)显示用户的微博,还要显示用户发布了多少篇微博。你会发现,很多做法和 9.3 节列出所有用户时类似。
虽然 11.3 节才会用到微博控制器,但马上就需要使用视图,所以现在就要生成控制器:
$ rails generate controller Microposts
这一节的主要目的是渲染用户发布的所有微博。9.3.5 节用过这样的代码:
<ul class="users">
  <%= render @users %>
</ul>
这段代码会自动使用局部视图 _user.html.erb 渲染 @users 变量中的每个用户。同样地,我们要编写 _micropost.html.erb 局部视图,使用类似的方式渲染微博集合:
<ol class="microposts">
  <%= render @microposts %>
</ol>
注意,我们使用的是有序列表标签 ol(而不是无需列表 ul),因为微博是按照一定顺序显示的(按时间倒序)。相应的局部视图如代码清单 11.21 所示。
代码清单 11.21:渲染单篇微博的局部视图
app/views/microposts/_micropost.html.erb
<li id="micropost-<%= micropost.id %>">
  <%= link_to gravatar_for(micropost.user, size: 50), micropost.user %>
 <span class="user"><%= link_to micropost.user.name, micropost.user %></span>
 <span class="content"><%= micropost.content %></span>
 <span class="timestamp">
 Posted <%= time_ago_in_words(micropost.created_at) %> ago.
 </span>
</li>
这个局部视图使用了 time_ago_in_words 辅助方法,这个方法的作用应该很明显,效果会在 11.2.2 节看到。代码清单 11.21 还为每篇微博指定了 CSS ID:
<li id="micropost-<%= micropost.id %>">
这是好习惯,说不定以后要处理(例如使用 JavaScript)单篇微博呢。
接下来要解决显示大量微博的问题。我们可以使用 9.3.3 节显示大量用户的方法来解决这个问题,即使用分页。和前面一样,我们要使用 will_paginate 方法:
<%= will_paginate @microposts %>
如果和用户列表页面的代码(代码清单 9.41)比较的话,会发现之前使用的代码是:
<%= will_paginate %>
前面之所以可以直接调用,是因为在用户控制器中,will_paginate 假定有一个名为 @users 的实例变量(9.3.3 节说过,这个变量所属的类应该是 AvtiveRecord::Relation)。现在,因为还在用户控制器中,但是我们要分页显示微博,所以必须明确地把 @microposts 变量传给 will_paginate 方法。当然了,我们还要在 show 动作中定义 @microposts 变量,如代码清单 11.22 所示。
代码清单 11.22:在用户控制器的 show 动作中定义 @microposts 变量
app/controllers/users_controller.rb
class UsersController < ApplicationController
  .
  .
  .
  def show
    @user = User.find(params[:id])
 @microposts = @user.microposts.paginate(page: params[:page])  end
  .
  .
  .
end
注意看 paginate 方法是多么智能,甚至可以在关联上使用,从 microposts 表中取出每一页要显示的微博。
最后,还要显示用户发布的微博数量。我们可以使用 count 方法实现:
user.microposts.count
和 paginate 方法一样,count 方法也可以在关联上使用。count 的计数过程不是把所有微博都从数据库中读取出来,然后再在所得的数组上调用 length 方法,如果这样做的话,微博数量一旦很多,效率就会降低。其实,count 方法直接在数据库层计算,让数据库统计指定的 user_id 拥有多少微博。(所有数据库都会对这种操作做性能优化。如果统计数量仍然是应用的性能瓶颈,可以使用“计数缓存”进一步提速。)
综上所述,现在可以把微博添加到资料页面了,如代码清单 11.23 所示。注意,if @user.microposts.any?(在代码清单 7.19 中见过类似的用法)的作用是,如果用户没有发布微博,不显示一个空列表。
代码清单 11.23:在用户资料页面中加入微博
app/views/users/show.html.erb
<% provide(:title, @user.name) %>
<div class="row">
 <aside class="col-md-4">
 <section class="user_info">
 <h1>
  <%= gravatar_for @user %>
  <%= @user.name %>
 </h1>
 </section>
 </aside>
 <div class="col-md-8">
  <% if @user.microposts.any? %>
 <h3>Microposts (<%= @user.microposts.count %>)</h3>
 <ol class="microposts">
  <%= render @microposts %>
 </ol>
  <%= will_paginate @microposts %>
  <% end %>
</div> </div>
现在,我们可以查看一下修改后的用户资料页面,如图 11.5。可能会出乎你的意料,不过也是理所当然的,因为现在还没有微博。下面我们就来改变这种状况。
 图 11.5:添加显示微博的代码后用户的资料页面,但没有微博
11.2.2 示例微博
在 11.2.1 节,为了显示用户的微博,创建或修改了几个模板,但是结果有点不给力。为了改变这种状况,我们要在 9.3.2 节用到的种子数据中加入一些微博。
为所有用户添加示例微博要花很长时间,所以我们决定只为前六个用户添加。为此,要使用 take 方法:
User.order(:created_at).take(6)
调用 order 方法的作用是按照创建用户的顺序查找六个用户。
我们要分别为这六个用户创建 50 篇微博(数量要多于 30 个才能分页)。为了生成微博的内容,我们要使用 Faker 提供的 Lorem.sentence 方法。[2]添加示例微博后的种子数据如代码清单 11.24 所示。
代码清单 11.24:添加示例微博
db/seeds.rb
.
.
.
users = User.order(:created_at).take(6)
50.times do
  content = Faker::Lorem.sentence(5)
  users.each { |user| user.microposts.create!(content: content) }
end
然后,像之前一样重新把种子数据写入开发数据库:
$ bundle exec rake db:migrate:reset
$ bundle exec rake db:seed
完成后还要重启 Rails 开发服务器。
现在,我们能看到 11.2.1 节的劳动成果了——用户资料页面显示了微博。[3]初步结果如图 11.6 所示。
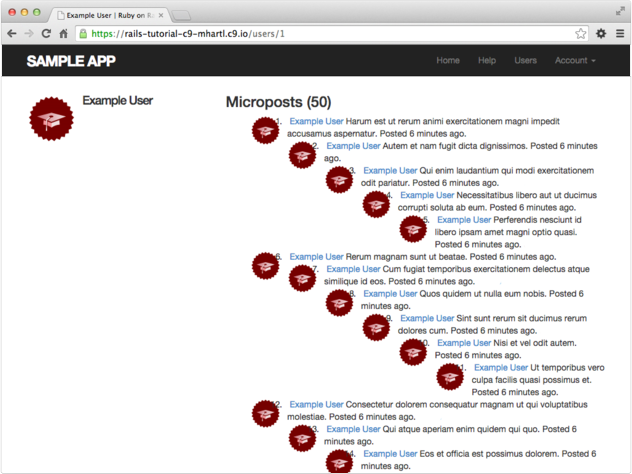 图 11.6:用户资料页面显示的微博,还没添加样式
图 11.6 中显示的微博还没有样式,那我们就加入一些样式,如代码清单 11.25 所示,[4]然后再看一下页面显示的效果。
代码清单 11.25:微博的样式(包含本章要使用的所有 CSS)
app/assets/stylesheets/custom.css.scss
.
.
.
/* microposts */

.microposts {
  list-style: none;
  padding: 0;
  li {
    padding: 10px 0;
    border-top: 1px solid #e8e8e8;
  }
  .user {
    margin-top: 5em;
    padding-top: 0;
  }
  .content {
    display: block;
    margin-left: 60px;
    img {
      display: block;
      padding: 5px 0;
    }
  }
  .timestamp {
    color: $gray-light;
    display: block;
    margin-left: 60px;
  }
  .gravatar {
    float: left;
    margin-right: 10px;
    margin-top: 5px;
  }
}

aside {
  textarea {
    height: 100px;
    margin-bottom: 5px;
  }
}

span.picture {
  margin-top: 10px;
  input {
    border: 0;
  }
}
图 11.7 是第一个用户的资料页面,图 11.8 是另一个用户的资料页面,图 11.9 是第一个用户资料页面的第 2 页,页面底部还显示了分页链接。注意观察这三幅图,可以看到,微博后面显示了距离发布的时间(例如,“Posted 1 minute ago.”),这就是代码清单 11.21 中 time_ago_in_words 方法实现的效果。过一会再刷新页面,这些文字会根据当前时间自动更新。
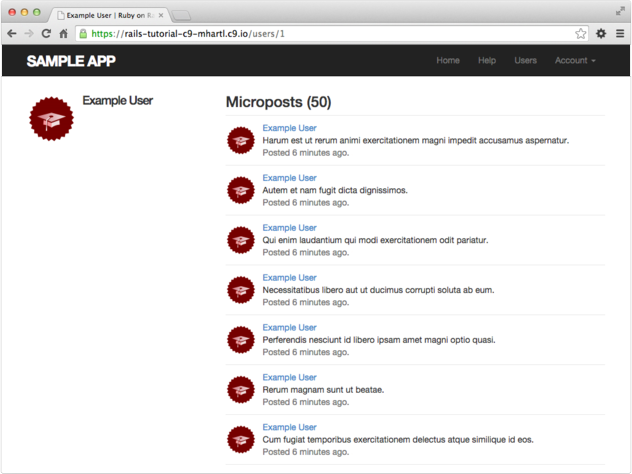 图 11.7:显示有微博的用户资料页面(/users/1)
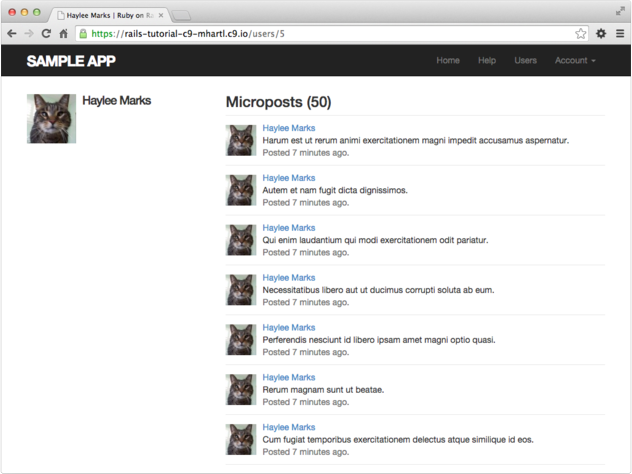 图 11.8:另一个用户的资料页面(/users/5),也显示有微博
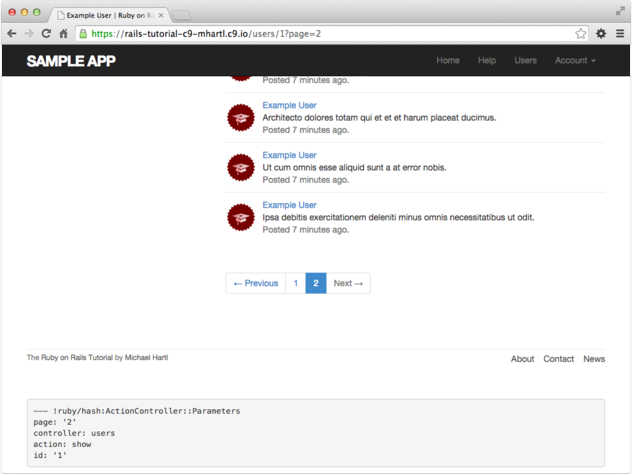 图 11.9:微博分页链接(/users/1?page=2)
11.2.3 资料页面中微博的测试
新激活的用户会重定向到资料页面,那时已经测试了资料页面是否能正确渲染(代码清单 10.31)。本节,我们要编写几个简短的集成测试,检查资料页面中的其他内容。首先,生成资料页面的集成测试文件:
$ rails generate integration_test users_profile
      invoke  test_unit
      create    test/integration/users_profile_test.rb
为了测试资料页面中显示有微博,我们要把微博固件和用户关联起来。Rails 提供了一种便利的方法,可以在固件中建立关联,例如:
orange:
  content: "I  just  ate  an  orange!"
  created_at: <%= 10.minutes.ago %>
 user: michael
把 user 的值设为 michael 后,Rails 会把这篇微博和指定的用户固件关联起来:
michael:
  name: Michael Example
  email: michael@example.com
  .
  .
  .
为了测试微博分页,我们要使用代码清单 9.43 中用到的方法,通过嵌入式 Ruby 代码多生成一些微博固件:
<% 30.times do |n| %>
micropost_<%= n %>:
  content: <%= Faker::Lorem.sentence(5) %>
  created_at: <%= 42.days.ago %>
  user: michael
<% end %>
综上,修改后的微博固件如代码清单 11.26 所示。
代码清单 11.26:添加关联用户后的微博固件
test/fixtures/microposts.yml
orange:
  content: "I  just  ate  an  orange!"
  created_at: <%= 10.minutes.ago %>
 user: michael
tau_manifesto:
  content: "Check  out  the  @tauday  site  by  @mhartl:  http://tauday.com"
  created_at: <%= 3.years.ago %>
 user: michael
cat_video:
  content: "Sad  cats  are  sad:  http://youtu.be/PKffm2uI4dk"
  created_at: <%= 2.hours.ago %>
 user: michael
most_recent:
  content: "Writing  a  short  test"
  created_at: <%= Time.zone.now %>
 user: michael
<% 30.times do |n| %> micropost_<%= n %>:
 content: <%= Faker::Lorem.sentence(5) %> created_at: <%= 42.days.ago %> user: michael <% end %>
测试数据准备好了,测试本身也很简单:访问资料页面,检查页面的标题、用户的名字、Gravatar 头像、微博数量和分页显示的微博,如代码清单 11.27 所示。注意,为了使用代码清单 4.2 中的 full_title 辅助方法测试页面的标题,我们要把 ApplicationHelper 模块引入测试。[5]
代码清单 11.27:用户资料页面的测试 GREEN
test/integration/users_profile_test.rb
require 'test_helper'

class UsersProfileTest < ActionDispatch::IntegrationTest
 include ApplicationHelper
  def setup
    @user = users(:michael)
  end

  test "profile display" do
    get user_path(@user)
    assert_template 'users/show'
    assert_select 'title', full_title(@user.name)
    assert_select 'h1', text: @user.name
    assert_select 'h1>img.gravatar'
    assert_match @user.microposts.count.to_s, response.body
    assert_select 'div.pagination'
    @user.microposts.paginate(page: 1).each do |micropost|
      assert_match micropost.content, response.body
    end
  end
end
检查微博数量时用到了 response.body,第 10 章的练习中见过。别被名字迷惑了,其实 response.body 的值是整个页面的 HTML 源码(不只是 body 元素中的内容)。如果我们只关心页面中某处显示的微博数量,使用下面的断言找到匹配的内容即可:
assert_match @user.microposts.count.to_s, response.body
assert_match 没有 assert_select 的针对性强,无需指定要查找哪个 HTML 标签。
代码清单 11.27 还在 assert_select 中使用了嵌套式句法:
assert_select 'h1>img.gravatar'
这行代码的意思是,在 h1 标签中查找类为 gravatar 的 img 标签。
因为应用能正常运行,所以测试组件应该也能通过:
代码清单 11.28:GREEN
$ bundle exec rake test